How To: Pre-Sprout Ranunculus & Anemones
Pre-sprouting Ranunculus & Anemones sounds a lot more daunting than it actually is, so I'm going to show you just how simple it can be!
Why do we pre-sprout?
Most gardeners in Phoenix have mixed garden beds with many different flowers, vegetables, and herbs. We still irrigate quite frequently during the months of October and November, getting our winter gardens established.
Consistent watering can be problematic for Ranunculus and anemones. The flower corms need to dry out quite a bit in between waterings. Too much water can cause them to rot quickly. If you have the ability to turn off your watering & have well-draining soil, you may be able to skip steps 2-4 and plant the pre-soaked corms directly into the soil.
In this guide, I will show you how I use 72c trays to successfully pre-sprout your ranunculus and anemone corms. Planting them in tray cells will help ensure that the soil drys out completely in between waterings. If you are pre-sprouting butterfly ranunculus, I would recommend using small pots in the 2.5-3” size range, for their corms are much larger.
Materials needed:
Corms
Cells 72c tray size
Potting mix - I like the “organic potting mix” from Summer Winds Nursery
Step 1: Soak your corms
Your corms will come dry and shrivel up like a mini octopus. To get their growing process started, place your ranunculus in a bowl and soak them in water for 3-4 hours. Some sites will tell you to change the water every 30 mins or put a bubbler in it. I don't do either of them and I've had success.
Step 2: Pre-moisten your soil
Moisten up some potting mix before planting your corms into the cells. I like to use the potting mix from Summer Winds because it's fine enough and has good drainage for your corms to pre-sprout. It comes in a blue bag and is labeled ‘organic potting mix’. You can grab a spare tub and make sure that your soil gets wet, but not dripping or saucy. This is especially important if your potting mix is dry, which is a common occurrence here in the desert.
Step 3: Plant your ranunculus in trays
I generally use 72c trays (72 cells in a tray) for my ranunculus and anemones. After they pre-soak they will plump up a bit and will fit perfectly into this size cell. Fill cells ⅓ of the way with pre-moistened potting mix, place corms in cells, and then top off the cells with the remaining potting mix. Do not water if your soil has been pre-moistened. If you forgot this is the time to water them in!

Step 4: Rooting the corms
Place your ranunculus in a cool dark place. I place mine on the cool concrete, undercover in my backyard. Water them only when they are dry. Usually takes 4-6 to completely dry out after initial planting in cells. Keep ranunculus in this cool dark spot for about 2 weeks, anemones may take up to 3 weeks. This helps the plants focus on roots rather than foliar growth. After this time period, you can place your seedlings in a sunnier location until planting time.
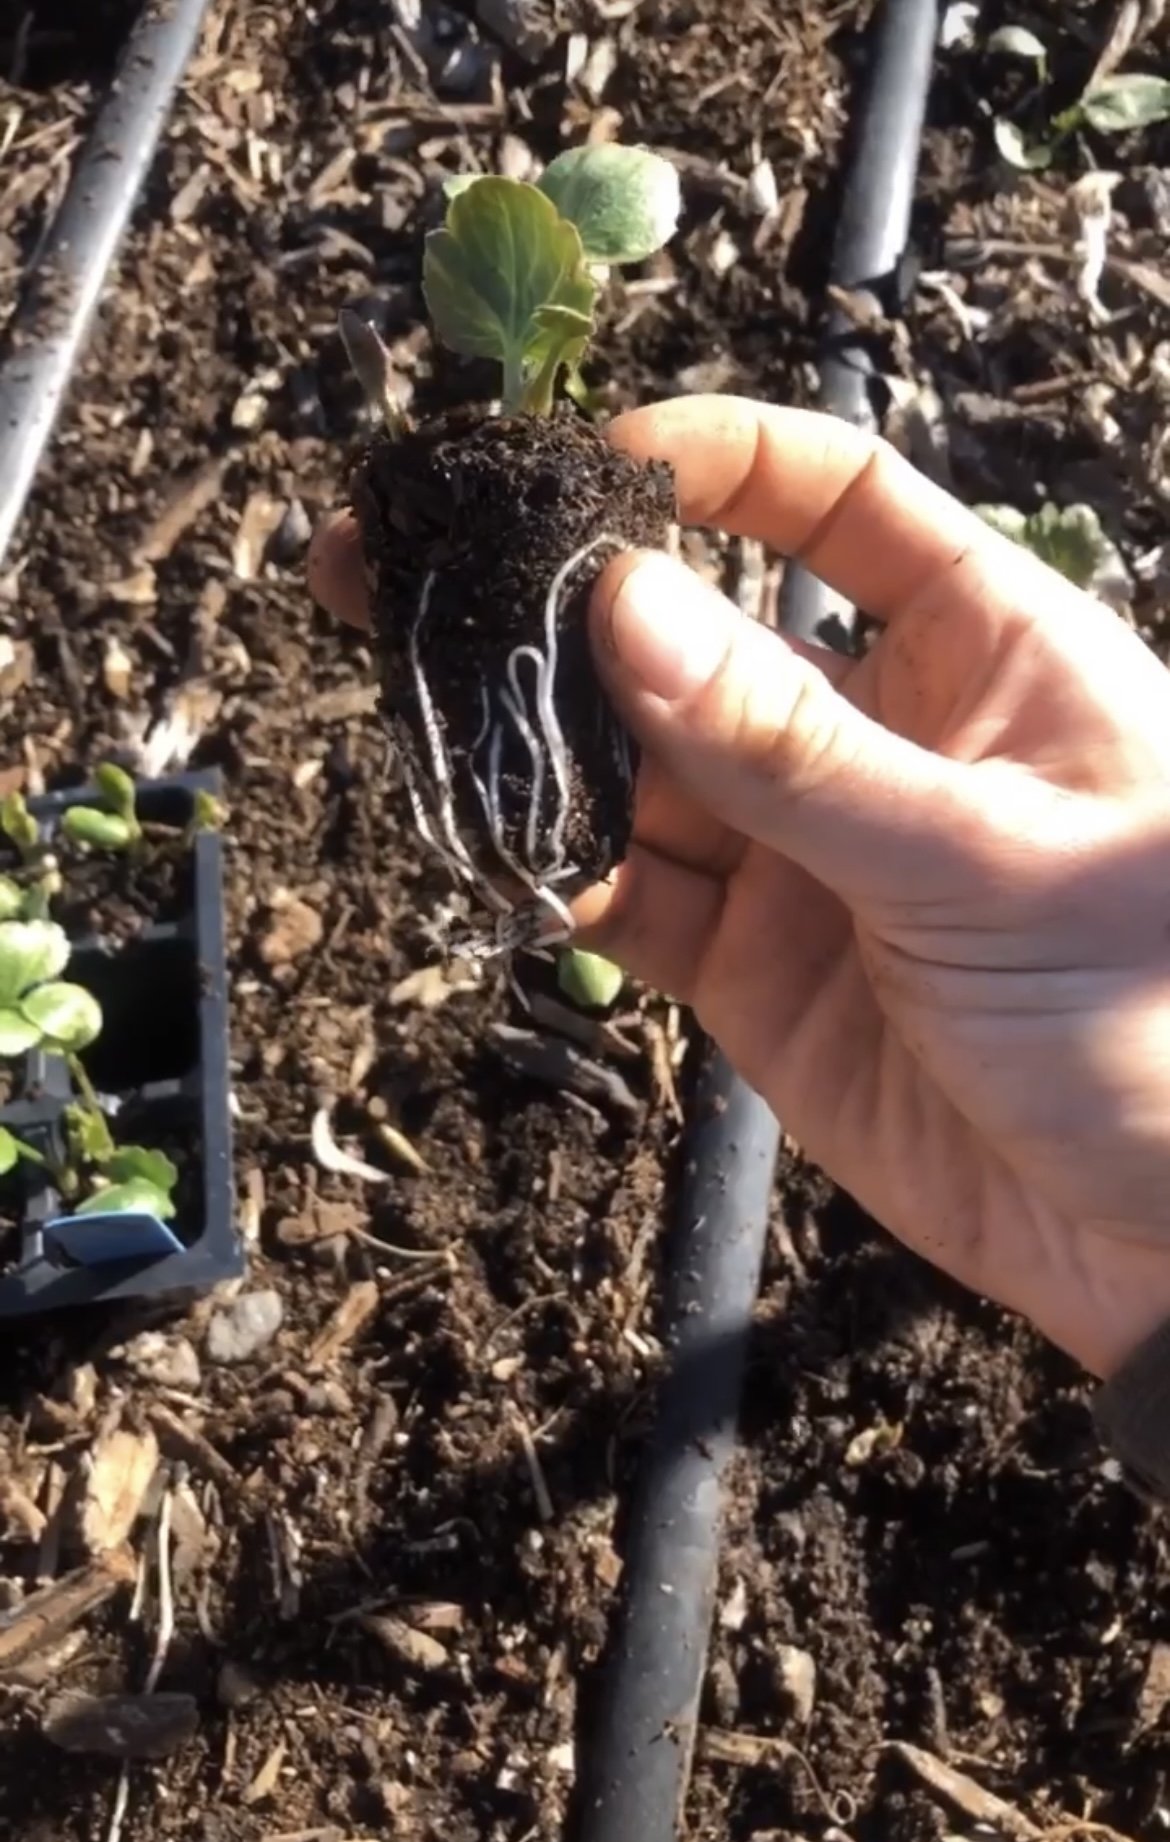
Step 5: Plant pre-sprouted anemones and ranunculus into your beds
At this point, the corms should have roots and a little bit of foliar growth. I always check to see if the roots are sticking out the bottom of the cell as a good sign it's time to plant. It's OK to plant if the cells are not fully rooted out, you just want them to have some root structure before planting.
I plant them exactly as I would any other flower plugs in the field. At this point, their root system can take up water so they can be planted in an irrigated landscape. Ranunculus can be spaced every 6-9” anemones can be spaced 4-6”.
And there you have it, that is the pre-sprouting process that I go through to have the very best success with my ranunculus and anemones! Stay tuned for my flower library for cool ranunculus varieties and other helpful tips and tricks!